The post 5 Easy Ways to Keep Subwoofer from Draining Battery appeared first on The Jazz Loft Project.
]]>The subwoofer is an essential part of your sound system but can also cause power-related problems. Knowing how to keep subwoofer from draining battery or energy is useful to it lasts for long.
Several possible causes of a subwoofer consuming too much power include having an amp that is too big, device settings causing increased energy consumption, and damage to wires or parts.
Let’s look at some of these common causes below.
Subwoofers are an essential part of a good sound system, but they can consume more power than intended for various reasons. A home sound system could result in higher electric bills, while a mobile model, such as a car sound system, may leave you with a more immediate problem in the form of an empty battery.
Small subwoofers can operate at below 100 watts, but powerful models go as high as 1000 watts. If you keep using a subwoofer that draws too much power, you will only waste battery and electricity. It’s better to address this early before the expenses pile up.
Here are some of the most common causes for higher energy consumption of subwoofers and how to address them.
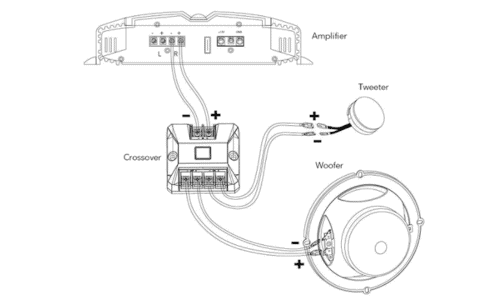
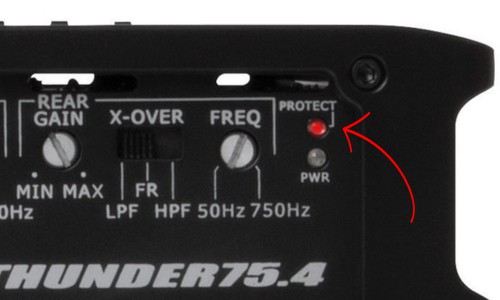
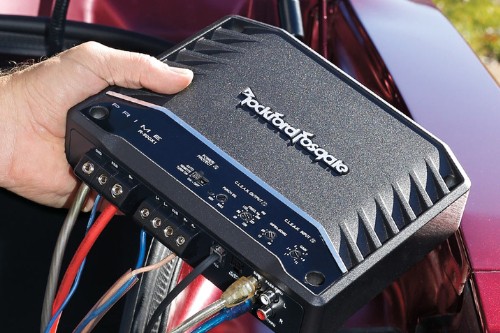
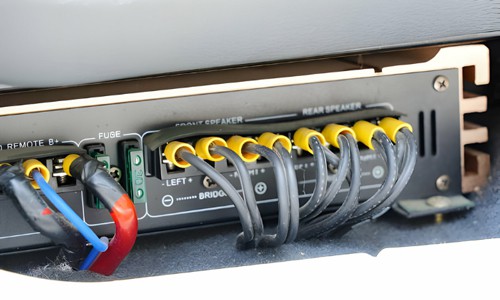
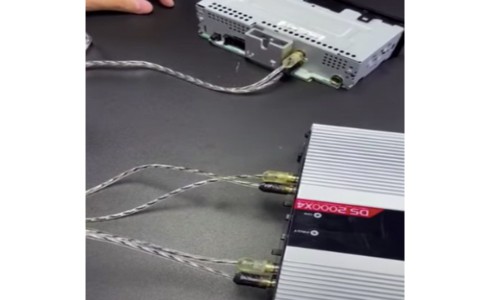
A subwoofer needs to be hooked up to an amplifier, and customizing this pairing allows for different output types. However, it can also be easy for a mismatch to occur, which may cause excessive power consumption, resulting in higher electricity bills or completely draining your battery.
The amp provides power to the subwoofer, but this doesn’t mean the sub can utilize all that energy.
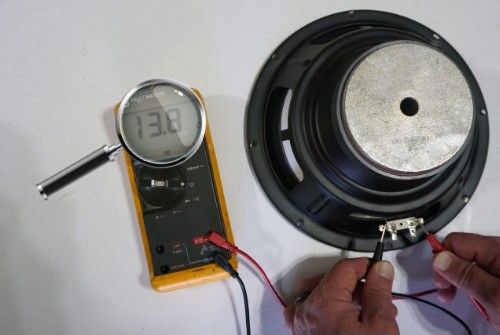
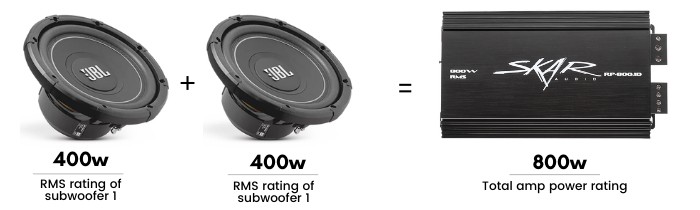
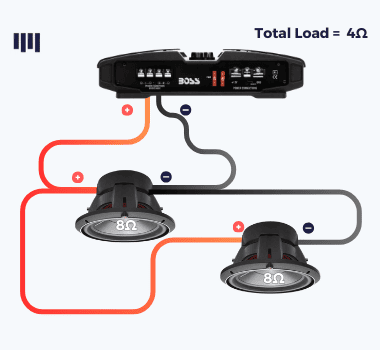
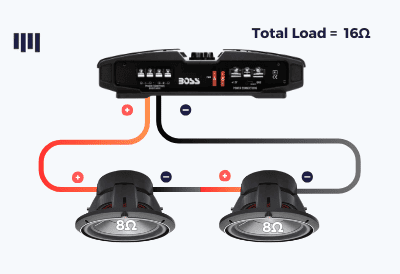
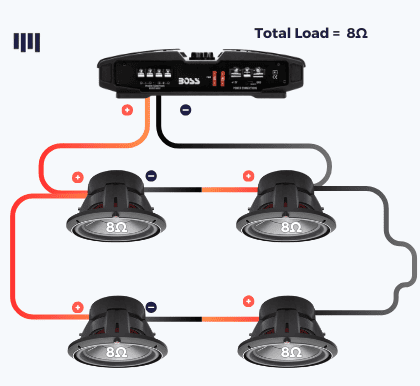
Check the power rating of the subwoofer and the amp to compare; look for the RMS number. Always ensure that the amplifier’s rating does not exceed the subwoofer’s to stop amp from draining battery.
Aside from draining too much energy, a too-large amp may also damage your subwoofer’s voice coil.
If the bass of your sound system is too low, it can ruin the sound quality, but sometimes we end up taking the volume too high. In this case, we risk overpowering the subwoofer to the extent of drawing too much energy.
The volume control regulates how much power we are directing to the subwoofer; a low volume means underpowering it, while a high volume drives more energy. This also means less operation time if you’re on a battery in high settings.
Manage your power consumption by bringing the volume to a moderate level, one where you get enough sound, but you’re not drawing too much energy. Even if you have a good battery with a high capacity, kicking the volume to max output will deplete your power source all too quickly.
Keeping the party going usually involves music, but we also need to remember the time spent operating the sound system. This isn’t usually a concern, but if you’re on a sound system battery, such as for a car, you might be surprised at how easily you run out of juice.
Even a phone charger can drain the power on a vehicle if left for too long, and switching to an extra battery is not as easy as it would be on a device such as a remote control. However, we can keep our vehicle’s engine running to mitigate the power drain.
There’s also the option of hooking up a dedicated battery for amplifier and subwoofer to keep your vehicle in good running condition even when operating your subwoofer for long periods. It would be best if you also considered unplugging your home sound system when not in use since these still consume power even when off.
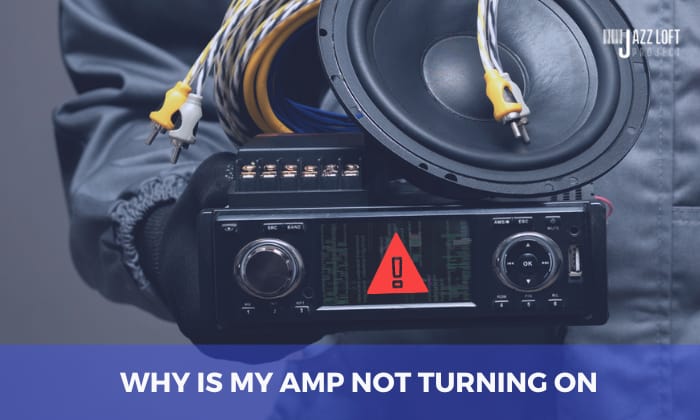
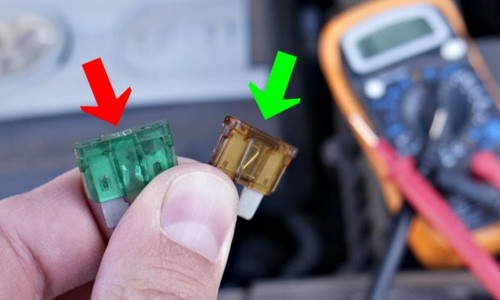
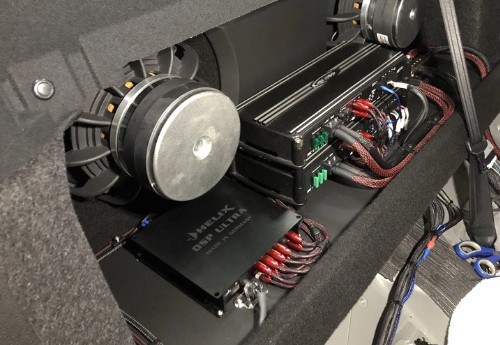
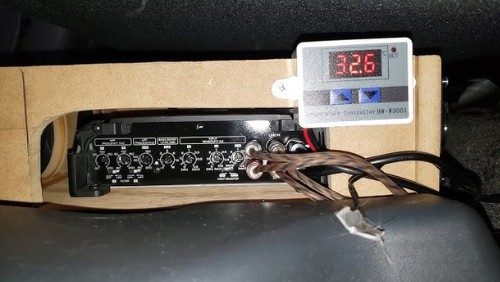
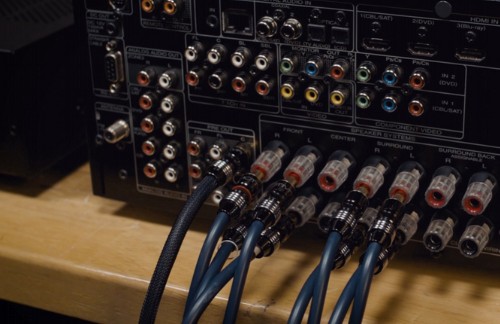
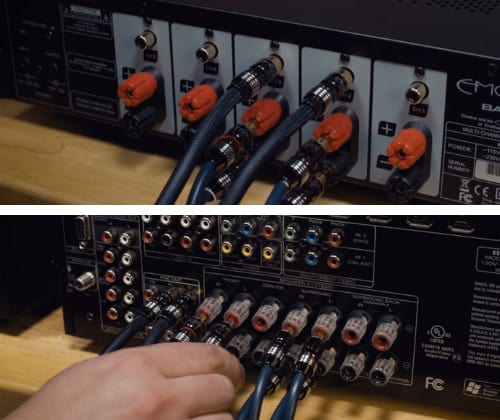
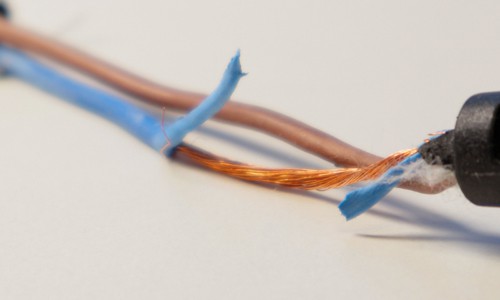
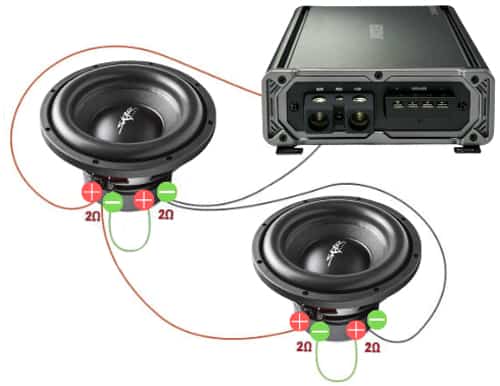
Loose or improper wiring can cause different problems, including increased power draw. The wiring to the amplifier is a good place to start when looking into this type of issue.
Ensure that wires are all properly connected to prevent this problem. If left unchecked, simple wiring problems can develop into bigger concerns, such as damaged components or a burned capacitor.
At that point, you may need professional assistance and a larger bill to pay. Address such problems as early as possible to keep the cost down.
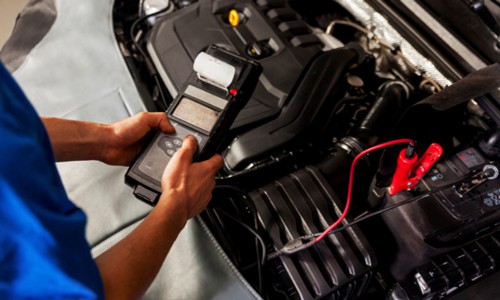
Even if your wires are in good condition and properly connected, you may still need help if there are problems with the power source. You’re more likely to run into this sort of problem when using a sound system battery such as for a car. Even a separate battery is not much help if it is too weak or small, so ensure that you have one with ample capacity.
Another power source concern is due to a faulty alternator. The alternator is responsible for producing electrical energy,; a broken one would leave your battery drained because nothing supplements the electricity supply.
Of course, this also means that the car won’t start, so you will probably have a bigger problem on your hands than just a dead sound system. Having the alternator fixed will get you back on track.
Now we have a better understanding of power concerns related to your sound system, specifically how to keep subwoofer from draining battery or consuming too much energy. Energy that runs out too quickly is a frustrating problem, but this knowledge will help address such concerns more easily.
What power problems have you encountered, and how do you manage them? Is changing or adding a battery an effective solution? Tell us your thoughts in the comments section below.
Sam Stephenson is a writer who grew up in Washington, North Carolina. He was 2010 and 2015 ASCAP Deems Taylor / Virgil Thomson Prize winner and a 2019-2020 Guggenheim Fellow in General Nonfiction. His books have been published by W.W. Norton, Alfred A. Knopf, and Farrar, Straus and Giroux
The post 5 Easy Ways to Keep Subwoofer from Draining Battery appeared first on The Jazz Loft Project.
]]>The post How to Install 2 Amps in a Car Diagram appeared first on The Jazz Loft Project.
]]>Enhancing your car’s sound system is one way of improving its audio quality. It gives you a clearer and louder sound while listening to music. Because of this, many owners put multiple amps in their cars.
Are you also interested in boosting your car’s sound system? Check out this article because we’ll show you how to install 2 amps in a car diagram!
Installing two amps with one power wire isn’t rocket science; you must ensure you meet the power requirements.
You can check this schematic diagram before you dive into the detailed steps below.
This is very important to avoid the risk of any electrical spark. To do this, you need to unplug your battery’s negative terminal.
When using one power source to install two amps, it’s advisable to use a power distribution block to manage power input efficiently. This setup requires you to connect the battery’s main cable to a fuse holder and then a power distribution block.
To connect two car amplifiers together, you have to hook them up to the power distribution block. Using your first amp’s power cable, connect it to your distribution block’s power output. The same goes for your second amp.
In either case, ensure the power cable is the correct gauge for the amp’s requirement. As for the amps’ location, you can place them wherever you want, although it’s preferable that they’re side-by-side.
For safety purposes, you should use a second distribution block to make ground connections by running one ground cable for both amps and the car’s sound system. Keep in mind that the ground wires on your two amps should be of the same size as your power wire.
You can also connect a capacitor to the distribution block, and then chassis ground the former. That said, most stereo systems nowadays don’t require a capacitor, so you can forgo this.
Add a remote turn-on wire if your amps need external input to function. Connect the wire to the head unit’s back, and then the other end should be attached to your two amps.
In this setup, it’s ideal to have a transmitter connected to the head unit to make your amps start efficiently.
Connect your amps to the head unit’s preamp outputs to make sure they are functioning. If this isn’t possible, you have to use the Y adapter, wherein you have to attach the male part (one common end) to your head unit and the female parts (two other ends) to your amps.
Finally, you can connect the amps to the speaker by attaching the speaker’s positive terminal to the amp’s positive terminal. Likewise, the negative wire should be connected to the negative terminal.
Once your amps or entire audio system works well after testing it out, reconnect the negative cable to the battery.
For a visual guide, you can also check this tutorial video on how to set up two amps in a car!
If you want to wire two amps without a distribution block, you can either use a selector switch or active crossovers.
Repeat the same process for the second amp—plug the speaker wire into the “B” input. Then, connect the speaker wire from the switch’s output to the speaker input. Do the same for the second speaker (if any).
Now that your speaker and amps are connected, you can use the selector switch to choose which amp you’ll use.
Then, attach the high-output signal of the active crossover to your amp. The low-output signal should also be linked to your other amp, which ideally should be paired with your low-frequency speaker.
Installing amplifiers in your car will allow you to achieve high-quality audio. To hook up two amps in a car using one power source, you have to either use a power distribution block or, if it’s not possible, a selector switch or active crossovers.
The important thing to keep in mind is that the power connections are appropriate to avoid any electrical issues.
Feel free to refer to this article for your guidance on how to install 2 amps in a car diagram!
Sam Stephenson is a writer who grew up in Washington, North Carolina. He was 2010 and 2015 ASCAP Deems Taylor / Virgil Thomson Prize winner and a 2019-2020 Guggenheim Fellow in General Nonfiction. His books have been published by W.W. Norton, Alfred A. Knopf, and Farrar, Straus and Giroux
The post How to Install 2 Amps in a Car Diagram appeared first on The Jazz Loft Project.
]]>The post Why is My Amp Not Turning on? appeared first on The Jazz Loft Project.
]]>It could be frustrating when you are ready to jam and record your piece, but suddenly, the guitar amp is not working.
There are various reasons why this occurs. The problem might stem from a blown fuse, protection mode, faulty wiring connection, a power outage, or other various potential causes.
In this article, I will share with you my journey of troubleshooting the problems to help you answer the question “why is my amp not turning on?”
You’ll discover different solutions to get your amp working again, like restarting your equipment or testing each speaker for functionality.
An amplifier is a must-have, especially when you are into music as an artist or composer, or simply because you love playing instruments. It helps you boost the sound waves from your instruments, allowing your speakers to generate a higher audio volume.
However, discovering that your amp won’t turn on is incredibly disappointing. So, to ensure you have a flawless music jam, let us explore the common issues that could cause an amp to not power on.
People commonly connect amplifiers to stereos, and you will usually find a thin cable, often colored blue with white, at the back of both devices. It acts as a turn-on or a remote wire that signals the amplifier to start working.
It could be one of the possible reasons why your amplifier does not turn on. Sometimes, the wiring might not connect to its rightful socket.
To fix this, ensure the amp remote wire goes to the radio’s remote wire (often labeled REM) and secure them with a butt connector.
If the amp has no power, check the ground connection. Make sure the wire is not rusty and is firmly plugged in. Also, look for any burns or faults on the wiring itself.
If you have already checked your wiring and it seems to be in good condition, it is time to inspect if your amplifier is not getting enough voltage.
To do this, you can use a digital multimeter to verify the voltage of the power wire.
Similar to the first issue, look for signs of burns, faults, or loose connections. If any of these issues are visible, it is best to replace the cable connection for safety and to prevent further damage to your amplifier.
Finally, if the amp has no power, ensure the switch is in the “ON” position before checking the power wire. Touch the multimeter leads to the cable and see if it has 12 to 14V. If the reading is different, you know the energy source is the problem.
Extra Tip: If there is no sound from speakers or no sound from subs, the speakers or the subs are likely problematic, or the wiring (RCA cables) needs fixing. This is especially the case if you’ve confirmed your amp is functional.
Other than the previous issues, ensure your fuse has not blown, as this can stop your amp from working.
If the fuse has gone bad, the best course of action is to replace it to ensure ongoing protection against power surges.
Moving on, if your amp is not turning on but light is on, it might be in protection mode.
The amplifier triggers this mode when it detects an issue like loose or faulty wiring, blown fuses, overloading, overheating, incorrect grounding, and more.
After addressing these issues properly, the protection mode will deactivate, allowing you to use your amplifier without any problems.
It is preferable to bring the amplifier to a qualified technician at this point if you have looked into and tested every possibility for why it isn’t turning on.
Make sure to take note of all the actions you took to resolve the problem on your own while you are explaining it to the technician. This way, they will be able to see the issue more concisely and broadly and will be able to address it more quickly as a result.
We hope this guide gave a concise answer to “why is my amp not turning on” and how to fix those issues.
We’ve discovered that many problems, like faulty wiring, cable connections, and power issues, can cause this.
Double-checking these elements helps pinpoint if the problem is inside or outside the amplifier. And when something isn’t working, replacing those components early can prevent bigger problems later on.
If you can’t fix the issue yourself, seeking help from a technician is the best solution.
Sam Stephenson is a writer who grew up in Washington, North Carolina. He was 2010 and 2015 ASCAP Deems Taylor / Virgil Thomson Prize winner and a 2019-2020 Guggenheim Fellow in General Nonfiction. His books have been published by W.W. Norton, Alfred A. Knopf, and Farrar, Straus and Giroux
The post Why is My Amp Not Turning on? appeared first on The Jazz Loft Project.
]]>The post Effects Loop vs Front of Amp appeared first on The Jazz Loft Project.
]]>If you’re just starting out on your guitar or bass journey, getting to know your amplifier is a big part of the deal. One thing that might have you scratching your head is whether you should use an effects loop or connect your pedals straight to the front of the amp.
It’s a decision that can seriously shape how your instrument sounds. This guide is here to help you figure out the differences between these two approaches so you can make the right call for your music.
Here’s a quick comparison table to give you an idea of the effects loop vs front of amp
Effects Loop | Front of Amp | |
Modulation | The sound comes through with exceptional clarity, and the effects are seamlessly applied across the entire tone. | The effects are noticeably amplified, creating a more pronounced impact on the overall sound. |
Tone Impact | No impact on the tone | The tone undergoes alterations depending on the musician’s personal preferences. |
Delay | The repeats resonate with heightened clarity and precision. | The repeats lose some of their pristine quality, taking on a more distorted character. |
Reverb | It provides musicians with a clear, high-end sound. | The reverb effect tends to overpower the overall audio output. |
It is sometimes troublesome to come across many music types of equipment and strategies, especially for beginners.
For guitar musicians or anyone who plays an instrument, it is a must to understand the implications of these choices on their sound. Without one of these, you’ll miss out, big time.
For beginners and seasoned guitarists alike, understanding the implications of effects loops for amps is crucial in shaping their musical journey.
Typically located at the rear of the amplifier and featuring send (output) and return (input) jacks, an effects loop enables the integration of pedals after the pre-amp and before the power amp, offering a versatile method to fine-tune your sound.
To understand fully, take a look at this effect loops diagram.
Pros and Cons
However, one potential drawback is that it may not always operate seamlessly and might require additional adjustments for optimal performance.
The front of a guitar amplifier, where you’ll find the essential controls, often includes input and output jacks, as well as a power switch.
This area typically allows you to access various settings to adjust the tone, especially for amp bass. At the same time, the send and return connections, vital for effects integration, are commonly found at the back of the amplifier.
Pros and Cons
Just remember, it might change how your amp normally sounds a bit and could make some extra noise, especially if you’re using a bunch of pedals.
When you’re deciding between using the effects loop for your amp or plugging pedals straight into the front, a few things come into play. The main difference lies in how they affect your amp’s distortion, noise levels, overdrive, ease of use, and fuzz.
If you want to learn more about how the sound differs between effects loop vs. direct, have a look at this.
Order | Pedal |
Before effects loop | Tuner |
Fuzz | |
Distortion | |
Overdrive | |
Compression | |
Boost | |
Equaliser (EQ) | |
Pitch-Shift/Octave | |
Filter | |
Wah | |
Usually in the effects loop, but depends on preference | Flanger |
Uni-vibe |
When considering the effects loop vs front of amp, both methods offer distinct advantages and limitations. Ultimately, the choice between these two approaches hinges on individual preferences, desired sound characteristics, and the specific musical context in which they are employed.
Sam Stephenson is a writer who grew up in Washington, North Carolina. He was 2010 and 2015 ASCAP Deems Taylor / Virgil Thomson Prize winner and a 2019-2020 Guggenheim Fellow in General Nonfiction. His books have been published by W.W. Norton, Alfred A. Knopf, and Farrar, Straus and Giroux
The post Effects Loop vs Front of Amp appeared first on The Jazz Loft Project.
]]>The post Why Does My Amp Cut Out at High Volume? appeared first on The Jazz Loft Project.
]]>At times, it can be bothersome asking yourself “why does my amp cut out at high volume?” However, I discovered that this is a common issue discussed online.
According to a Reddit user, FadeIntoReal, this problem occurs due to the amp drawing excessive current, a defective voice coil, or a leaky output component.
John Robson, a Former Technical Advisor, commented on Quora that the cause might be too much strain on the amplifier when the volume is turned up or wrong speaker impedance.
Crossover & Power Supply
The subwoofer bass fades at high volumes due to increased energy demand. When you turn on the system, the speakers are first to consume power, leaving and reducing the available energy for the subwoofer.
To solve the issue, set the subwoofer crossover point about 10Hz below the speaker’s lowest frequency. You should also check the car battery with a multimeter; it should read 12.5 to 12.8V with the engine off and 13.8 to 15.3V with the engine on.
Last but not least, ensure all cables are intact, and replace the fuse if it’s blown.
Excess Voltage Demand and Overheating
According to a user on the Car Audio Forum, if the amp shuts off when the bass hits, it might signal that the amplifier is demanding more voltage from your battery.
This situation occurs as a protective measure. The amplifier safeguards itself from overheating when the volume rises. Moreover, if the battery cannot handle it, it is forced into protection mode.
To fix this issue, you must enhance your ventilation by adjusting the placement of your amplifier or installing fan units.
Another solution is to routinely inspect or boost your voltage to meet the requirements of the amplifier.
If you raise your amplifier volume high and your car stereo turns off, it might indicate a problem when setting up the device. Also, due to incorrect installation, overloading issues may be your concern.
The best way to troubleshoot this issue is to ask for help from a certified and or qualified technician or installer.
Here are some examples of the typical problems when it comes to installation:
Wiring
In this situation, there might be a problem with faulty connections or incorrect cabling, causing misalignment among the speakers.
As advised by Reddit user avphenom, thoroughly inspect and examine the speaker cables and ensure the wires do not randomly contact each other.
Double-check the proper wiring connection between the amp and speakers. The ground wire should match the power wire in gauge and be protected with caulk to prevent corrosion.
To check for proper grounding, use a multimeter and measure the ohms between the grounding and the battery’s negative terminal. The result should be 0.5 ohm.
Overabundant Output Linking
Your 4-channel amp can cut out at high volume because you’re using too many speakers.
So, to resolve this, you might want to consider boosting your amplifier. This way, you will have a suitable audio system that provides the quality of sounds you prefer.
Check the ohms of your speakers and ensure your amp can handle them. If the amp says “4-8 ohms,” that’s the speaker impedance range it can accommodate.
Wiring speakers in a series will increase their impedance (two 8-ohm speakers will generate 16 ohms), while parallel connections will produce the opposite effect (three 6-ohm speakers generate 2 ohms).
Now that we answered the question “why does my amp cut out at high volume,” you can keep playing your music without disruption.
Before buying your amplifier, ensure that it is compatible with the voltage of your battery so that you won’t have a problem with overheating or insufficient power outputs.
Additionally, make sure that you ask for professional help when it comes to wiring so that you do not mess up the connection of your amplifier, causing it to go into protection mode.
Sam Stephenson is a writer who grew up in Washington, North Carolina. He was 2010 and 2015 ASCAP Deems Taylor / Virgil Thomson Prize winner and a 2019-2020 Guggenheim Fellow in General Nonfiction. His books have been published by W.W. Norton, Alfred A. Knopf, and Farrar, Straus and Giroux
The post Why Does My Amp Cut Out at High Volume? appeared first on The Jazz Loft Project.
]]>The post 3 Ways to Connect a Guitar Amp to a Computer appeared first on The Jazz Loft Project.
]]>There are many reasons you should consider plugging your guitar amplifier into your computer, and some of these reasons are for recording, editing, playing purposes, and for you to have a flawless sound experience.
So, how to connect a guitar amp to a computer?
There are multiple ways that you can do this: you can either connect it with a USB output, with an audio interface, or by turning the computer into an amplifier.
Read the details below to check the complete procedure.
Check the table below to know the ways and things you must prepare when you link your amp to a PC.
Method | Connection Types | Requirement |
Using USB Port | USB | Guitar Amplifier, software |
Audio Interface | USB, firewire | Jack Cable, USB Cable, Software (ASIO driver, Utilities), Amplifier |
Direct Plug-in Connection | USB | ⅛ TRS Cable (AUX cord), ¼ Jack Plug Adapter, Amp Simulator |
Some modern amplifiers may have a USB 2.0 cable, which allows you to directly plug the device into a computer.
You can forgo amp-to-PC cables and other devices, such as an audio interface. However, you’ll need to download the software that is offered by the manufacturer of the amplifier.
To ensure optimal performance, be sure that the software is up-to-date and adjust its buffer settings accordingly. If the connection speed seems slow or laggy, try switching to a high-speed USB cable.
Once you’re done setting up the amp, you can plug the guitar directly into the device.
The most common approach to connecting the guitar to a PC is through an audio interface, provided that your amp has an auxiliary (AUX) socket.
There are two types of audio interfaces: one tailored for solo instrument use and the other for handling multiple instruments. In this case, you’d need an audio interface for guitars.
Connecting your guitar to your computer could vary in methods. However, one of the best ways is to merely attach it directly using an AUX cord without an interface. This cable connector is one of the popular types of Tip Ring Sleeve ⅛ cable.
Below are the steps you need to adhere to this method:
Another advantage of using an amp simulator is that you’ll have hundreds of preset options, which makes it even easier to unleash your creativity.
After that, you can finally test if your guitar is working adequately.
Now that you understand how to connect a guitar amp to a computer, you can achieve the best-quality recording sound ever.
Exploring various methods helps you achieve your preferred sound. For professional-grade recordings, the first method would be best, as it can ensure faithful sound quality and reduce background noise.
However, if you are on a budget, it’s better to focus on acquiring the appropriate cable first for the direct connection of your instrument to your PC.
Sam Stephenson is a writer who grew up in Washington, North Carolina. He was 2010 and 2015 ASCAP Deems Taylor / Virgil Thomson Prize winner and a 2019-2020 Guggenheim Fellow in General Nonfiction. His books have been published by W.W. Norton, Alfred A. Knopf, and Farrar, Straus and Giroux
The post 3 Ways to Connect a Guitar Amp to a Computer appeared first on The Jazz Loft Project.
]]>The post What Size Amp Do I Need for 2 10 Inch Subs? appeared first on The Jazz Loft Project.
]]>One of the most common questions we hear from audio enthusiasts is, “What size amp do I need for 2 10-inch subs?” Well, it’s time to put this query to rest.
Determining the ideal amplifier for your duo subwoofers depends on their total RMS (Root Mean Square) wattage and impedance ratings. To be more specific, you’re looking for an amp that matches your subwoofers’ capabilities and specifications.
For example, if the total RMS of your subs is 600 watts, then you’d need to get an amplifier with an RMS that is around 600 watts as well. In addition, the amp should have a similar ohms rating to the combined impedance of both subs, which varies depending on how you wire the configuration.
Without delay, let’s get into the specifics!
Just like a typical speaker, you should also match an amplifier to a subwoofer. This ensures that your devices work efficiently and harmoniously to produce quality sound.
Choosing the right size amplifier for a pair of 10-inch subs leans on the following factors.
Identifying the right subwoofer amplifier size starts with understanding their RMS rating. You can think of RMS as the power a subwoofer comfortably handles over time without breaking.
If you have dual subwoofers, you’ll want to add their RMS ratings to get their combined power ratings. Once you have the answer, find an amplifier that matches this power to ensure your subs operate at their best while keeping your sound top-notch.
To illustrate, look at this formula:
RMS rating of subwoofer 1 + RMS rating of subwoofer 2 = total amp power rating
For example, we paired two 10-inch subs of 400-watt RMS each with an 800-watt RMS amp.
As a rule of thumb, never use an amp with excessive or low power. Slight power differences are acceptable. However, huge gaps may result in damage or distorted sound.
It’s also critical to match subwoofer impedance specifications to a compatible amp. Your chosen amp must be capable of supporting the total impedance of the subs to maintain a streamlined flow of power.
Measured in ohms (Ω), you can acquire the appropriate impedance levels in two ways.
1. Manual computation
First, consider whether the subs are wired in parallel (which reduces total impedance) or series (which increases it). Then, get the combined impedance of both subs. Assuming the answer is 4Ω, then a 4-ohm amp should be fitting.
Examine the diagram below:
2. Amp calculator
Alternatively, you can find an online tool that helps you calculate power and impedance. Simply provide the necessary details, and it automatically identifies the right amp size for your subs.
Impedance is a pivotal aspect when choosing an amp. However, as we said, ohm rating changes based on how the coils are wired together.
Selecting the best amps for subs is crucial in achieving the perfect balance between power and sound quality in your entire audio system. Amplifiers do more than just supply power; they also influence the sound’s character.
Some amps may add more richness to the bass, while others are powerful in delivering clearer, high-frequency sounds. Knowing what kind of sound output you prefer will dictate the perfect amp for your set of 10-inch subs.
Matching your subwoofer with a relevant amplifier isn’t a prerequisite. Thus, we recommend focusing on these parameters: total RMS power, impedance levels, and your preferred sound quality.
We hope your question on “What size amp do I need for 2 10-inch subs?” has been addressed well. With these tips, we’re confident you can create unparalleled sound to keep you entertained and immersed!
Sam Stephenson is a writer who grew up in Washington, North Carolina. He was 2010 and 2015 ASCAP Deems Taylor / Virgil Thomson Prize winner and a 2019-2020 Guggenheim Fellow in General Nonfiction. His books have been published by W.W. Norton, Alfred A. Knopf, and Farrar, Straus and Giroux
The post What Size Amp Do I Need for 2 10 Inch Subs? appeared first on The Jazz Loft Project.
]]>The post How to Daisy Chain Guitar Amps? – 3 Easy Ways appeared first on The Jazz Loft Project.
]]>A popular way of creating a massive sound with high quality is to daisy-chain guitar amps. However, if done incorrectly, you may end up damaging the amps or adversely affecting the wound quality.
So, how to daisy chain guitar amps? Keep reading to find out the various methods to ensure your riffs sound clean and impressive.
Daisy-chaining is a method of connecting all the audio devices together so that they share the same source. Doing so produces fuller, more complex, and more pronounced tones.
This technique is also helpful for musicians who need more control over the volume during a performance or recording using multiple smaller amps.
The common methods of daisy chaining amplifiers are summarized below.
Method | Pros | Cons |
Direct Serial Connection | ● Straightforward setup
● Suitable for beginners |
● May produce phasing issues.
● Sound quality may not be ideal |
Effects Pedal Connection | ● Allows modular placement of effects between the preamp and power amp stages.
● Prevent your playing from sounding mushy ● Great for bassists
|
● Not all pedals have two outputs
● If paired with a buffered AB/Y splitter, the entire setup can be expensive |
Buffered AB/Y-Cable Splitting | ● Makes it possible to either play through two amps simultaneously or one at a time
● Amps can be arranged in any order or configuration. |
● Buffered AB/Y splitters are expensive.
● AB/Y splitters without isolated outputs may cause buzzing sounds
|
This is the simplest way to daisy-chain your guitar amps, as the steps are pretty straightforward.
However, this method creates a phenomenon called ‘phasing’ wherein the sounds produced by the amplifiers seem out of phase with one another, leading to tones sounding incomplete and not well-rounded.
If you are curious how to do this method of daisy-chaining, check out the steps below:
If you want modular placement of effects and get a clearer sound, a great method is using an effect pedal with stereo outputs. It’s also ideal for bassists, as they can create an illusion that there’s a guitar playing along with them.
The steps for creating an effects pedal connection are as follows:
For those who don’t have an AB/Y splitter, it’s okay to forgo this appliance, provided that your effect pedal has two outputs. In this case, the setup should look like this:
As you can see, this setup is quite complicated. What’s more, adding an AB/Y splitter into the configuration means a higher overall cost. Plus, you may not be able to find an effect pedal with both “Dry Out” and “Effect Out” outputs.
If you want to send your guitar signal to two amps simultaneously rather than in a series, you can use a buffered AB/Y box, which ensures signal strength and faithful sounds.
However, a buffered AB/Y box, especially those with a phase reverse switch, can be expensive. Plus, those without an isolated output may cause ground loops, which results in annoying humming or buzzing sounds.
If you are interested in using this daisy chain method, see the steps below:
This allows you to play through two amps simultaneously without a strict serial signal path.
If not, simply change the setting so that you’re either playing from the A or B port.
Knowing how to daisy chain guitar amps is definitely a great advantage and opens up a new world of possibilities for those exploring and honing their craft. Enjoy the journey of creating unique, complex tones and exploring and improving your skills through daisy-chained sound effects.
Sam Stephenson is a writer who grew up in Washington, North Carolina. He was 2010 and 2015 ASCAP Deems Taylor / Virgil Thomson Prize winner and a 2019-2020 Guggenheim Fellow in General Nonfiction. His books have been published by W.W. Norton, Alfred A. Knopf, and Farrar, Straus and Giroux
The post How to Daisy Chain Guitar Amps? – 3 Easy Ways appeared first on The Jazz Loft Project.
]]>The post How to Connect a Power Amp to an AV Receiver? appeared first on The Jazz Loft Project.
]]>It must be frustrating to hear audio or music not as loud as you want it to be or to watch a movie with disappointing sound quality.
The good thing is companies like Sony and Yamaha produced AV receivers that we all need to produce a better volume.
This guide on how to connect a power amp to an AV receiver will help you learn the proper ways to use your equipment together to achieve the home theater experience you need.
We all know AV receivers are brilliant devices for boosting weak signals, but these tools sometimes don’t have enough built-in amplifiers to process their channels.
In this case, adding another power amp is a good way to improve your audio quality. We’ll show you how to do just that below.
What to prepare:
Connecting an amplifier to a receiver will require you to plug various wires into cable ports. To avoid confusion, label each wire we listed above.
Before you hook up an amplifier to a receiver, ensure that everything is unplugged so that no power runs through the cables.
This practice will keep you and your equipment safe from any electrical damage.
Attaching trigger wires to both the external amplifier and the AV receiver will help you activate and deactivate both devices without turning them on and off separately.
All you have to do is plug one end of the trigger wire into the power amplifier’s trigger jack and connect the other end to the AV receiver’s port.
Now that you have connected the trigger wires to both devices, the next step is to plug the RCA connectors into both.
For adding an amp to a receiver, find the AV receiver’s output and plug the one end of the RCA cable for audio into it. Then, insert the other end into the power amplifier’s input.
Match each RCA cable to a pre-out on the receiver and a corresponding speaker input on the power amp.
Afterward, ensure the power amp is set to an unbalanced connection, as some devices have ‘balanced’ and ‘unbalanced’ settings.
Since speakers to amplifiers get activated by connecting the speaker wires to the amp, input the correct type of wire to the amplifier’s jacks.
Plug in the positive connector to the positive jack and the negative connector to the negative jack.
Speaker 1 should be connected to Speaker 1’s jack, and Speaker 2 should be connected to its designated jack. Joining opposite wires in incorrect jacks will make them not work.
What if your receiver has no preouts? Connecting a power amplifier to an AV receiver without pre-outs will require you to do some modifications to create these parts.
For receivers with a surround sound decoder, it’s possible to use a line-level converter to convert the speaker signals. Essentially, the converter will reduce the speaker output so that it doesn’t overload the power amp.
This method is less complicated than creating your own pre-outs, but the sound quality won’t be as impressive.
Now that you know how to connect a power amp to an AV receiver, you can successfully set up these devices for home theater and get the theatrical experience you need under the comfort of your own roof!
Ensure to connect your trigger wires and RCA connectors to both the power amplifier and AV receiver, and connect speaker wires to the amp to make these steps successful.
For an easier setup, put labels on each wire so you won’t get confused. Click this video to see the actual steps!
Sam Stephenson is a writer who grew up in Washington, North Carolina. He was 2010 and 2015 ASCAP Deems Taylor / Virgil Thomson Prize winner and a 2019-2020 Guggenheim Fellow in General Nonfiction. His books have been published by W.W. Norton, Alfred A. Knopf, and Farrar, Straus and Giroux
The post How to Connect a Power Amp to an AV Receiver? appeared first on The Jazz Loft Project.
]]>The post How to Connect 6 Speakers to a 2 Channel Amp? appeared first on The Jazz Loft Project.
]]>We mentioned in our previous post that a 2-channel amp should only handle up to 4 speakers. However, did you know that it can power 6 speakers at the same time?
Yes, you heard right! Six speakers, one amp, and an extraordinary sound experience that transcends expectations. But, only if you do it carefully.
Improper configuration can cause your entire sound system to blow up in a blink!
So, tune in as we show you how to connect 6 speakers to a 2 channel amp. Let’s get started.
As we have said, you can connect 6 speakers to a 2-channel amp to upgrade your surround sound system. To be successful, you have to be very mindful of these crucial matters:
Before any configuration, note that you must balance the load between the two amp channels. Moreover, the amp should be capable of supporting the speakers’ load.
In our experience, standard speakers are 25 to 100 watts. If (for example) 4 of your speakers have 50 watts and 2 have 100 watts, then you have 4*50 + 2*100 = 400 watts in total.
Hence, each channel must bear a 200-watt load, and you need to divide the speakers accordingly.
Here’s a schematic wiring diagram to help you visualize the situation.
Every amp model handles distinct loads. Always check the user’s manual and validate if this setup is doable for your amp model.
Series and parallel wiring are two ways to connect multiple speakers to a 2-channel amp. Choosing the best method will depend on the speaker and amp’s impedance or minimum ohm rating.
Consider the tips below:
Disclaimer: Don’t attempt to connect the speakers if the impedance is beyond the amp’s limits. The amp can’t handle the load and will incur damage.
Generally, the parallel and series configurations, or a combination of both, can be used to wire a 2-channel amp to 6 speakers. Learn more below:
In this setup:
Parallel wiring is typical and straightforward. This video shows you how to do this layout correctly.
This is a process of connecting multiple speakers where the positive (+) and negative (-) output wires from the amp feed to the same leads on the speakers (positive to positive, negative to negative).
These easy steps can help you do series wiring:
For reference, we suggest watching this instructional video.
In some cases, combining parallel and series wiring is applicable. Here, you connect two or more speakers in a series. Then, you link these series groups in parallel to the amp.
Understanding how to connect 6 speakers to a 2 channel amp can seem daunting. This is especially true if you have difficulty balancing the load. However, with proper wiring techniques, it’s entirely possible and efficient.
Irrespective of your preferred wiring method, always navigate back to the device guidebook to ensure compatibility, electrical safety, and optimum system performance. Your ultimate goal is to obtain the most impressive audio output while maintaining equipment safety.
Sam Stephenson is a writer who grew up in Washington, North Carolina. He was 2010 and 2015 ASCAP Deems Taylor / Virgil Thomson Prize winner and a 2019-2020 Guggenheim Fellow in General Nonfiction. His books have been published by W.W. Norton, Alfred A. Knopf, and Farrar, Straus and Giroux
The post How to Connect 6 Speakers to a 2 Channel Amp? appeared first on The Jazz Loft Project.
]]>