
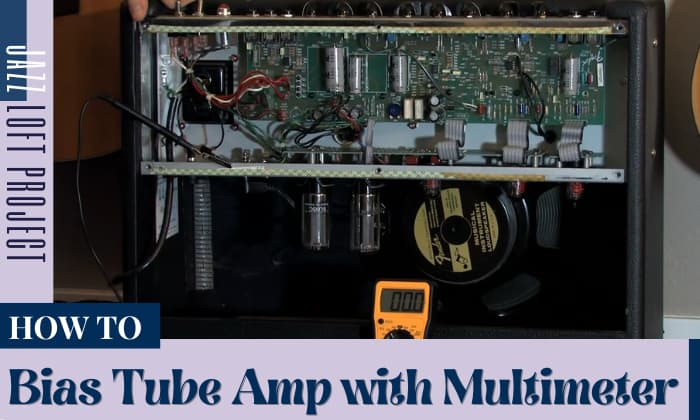
There are times when using your amplifier that you may experience distorted sounds. In this case, the most common problem is the lousy bias tube. It may need to be re-biased or replaced.
Hence, if you know how to bias tube amp with multimeter, you can quickly solve your problem and extend the lifespan of your amp.
Do you want to learn how to do it? You can follow the simple guide below.
Table of Contents
Step-by-step to Bias Tube Amp With Multimeter
What to Prepare
- Digital multimeter for measuring volts
- A speaker connected to the amp
- Small flat-head screwdriver
- A tray for better organizing the removed screws
- Replacement tube (Optional)
Apart from the bias meter, it would be best if you also get a tube amp bias probe, which serves as the connector of the tubes and metering device. Without bias probe, you may not be able to use your bias meter.
Step 1. Remove the Cover of the Amplifier
Before doing anything with your amp, switch it off and unplug it for at least 30 minutes to discharge any remaining current inside the unit.
After that, you can remove all of the screws that hold the exterior case in place. Use your tray to keep and organize all of the screws.
At the same time, you can remove and replace the tubes if you believe they no longer work. But only touch these parts when they are cool.
Step 2. Connect the Multimeter
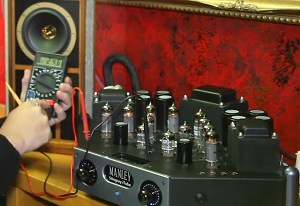
To get ready for bias correction, set up your tube biasing meter or multimeter. For an auto-range multimeter, you only need to set it to DC voltage, but for a non auto-range one, you must set it precisely at DC voltage and 2000 millivolts.
Next, insert the black lead into the multimeter’s common socket and connect its probe to the amplifier’s ground. At the same time, connect the red lead to the meter’s DC voltage socket and its probe to the positive bias terminal.
Most modern amplifier models have a handy ground and positive terminal for biasing tubes. As a result, you can make straightforward and proper connections with the probes of the multimeter.
However, older models may not have these features. Therefore you can use the negative binding post at the amplifier back for the ground. And for the positive connection, you may need to review the datasheet of your specific amp model.
This will give you an idea of where to place the multimeter’s positive probe.
Step 3. Turn On Standby Mode and Know the Recommended Bias Rating
After properly connecting your multimeter, you can connect the unit’s power plug. However, before turning on your amp, you should link it to a speaker and keep the amp on standby mode for at least two minutes. This practice will allow the tubes to warm up and prepare for biasing.
While you wait, you may now look up the suggested bias setting for your amplifier. Again, some units may have this recommended setting located at the chassis.
However, you can utilize an online tube bias calculator like this one for units that do not have recommended settings. In this scenario, you may need to enter your amp’s plate voltage rating and other parameters before clicking submit.
Also, remember that the common preferred bias point setting is 70%.
Step 4. Adjust Bias Tube Amp
Now that you have the correct bias setting and the tube has thoroughly warmed up, turn off standby mode and begin setting the bias. When you turn off the standby mode, the multimeter may quickly display the measure plate voltage.
If you find the tube amp bias too high, slowly rotate the trimming pot with a screwdriver until you reach the optimal level. Some amplifiers only have a single trimming pot. Meanwhile, other units have allocated trim pots for different tubes, so you must adjust each bias individually.
Step 5. Disconnect the Multimeter and Shut Down the Amp
Now that you are done with the process, you can turn off the amp and disconnect all the cables, including the multimeter, speaker, and power plug. Then, bring back the unit cover and get the amp ready for use.
Note: You can use additional tube biasing tools like a bias meter for monitoring the current and getting more accurate tuning.
Other Things You Need to Know
When biasing a tube amp, always keep in mind that you are working with a live connection. Furthermore, even when the device is currently turned off and unplugged, amp capacitors can still contain a charge that may be fatal.
In this case, you need to be extra careful about the things you are touching and always use proper equipment. Also, it would be best to let everything sit for about 30 mins after being unplugged before putting them back inside your amp.
What Happens if I Don’t Bias My Tube Amp?
Some amplifiers do not require rebiasing an amp when replacing tubes. This amp contains a fixed bias you cannot adjust as its manufacturer already did. However, only a few amp units have this setup since, most of the time, amps must be biased to match the tubes’ resistance.
Replacing power tubes without biasing might be dangerous as these tubes may not be able to hold the current distributed by the amp unit. As a result, they can quickly burn and incur damage, which can be a potential hazard for you as a user.
So, to prevent this from happening, always check your unit and test vacuum tubes before replacing them. Furthermore, it would also be best if buy a tube pair appropriate for your unit.
FAQs
What is the Ideal Bias Point for a 6L6 Tube?
The recommended bias 6L6 tubes depend on the amp unit rating. For example, your 6L6GC unit has a 450V plate rating and an output tube of 30 watts. Using the biasing tube amp calculator, you will get the recommended 70% bias point of 46.67 mA.
Can You Replace 6L6 with 6550 Tube Bias?
Yes, this is possible. However, 6550 tubes require more power than 6L6 ones. Aside from the electrical requirements, you should also consider the sound differences between the two. Some people find the 6550 to be more gritty in tone than the 6L6, for instance.
How to Tell if Your Amp Needs Biasing?
Mostly, tube bias affect tone. So, when you notice changes in sounds, it may be the right time to re-bias your amp tube or replace it with a new one. Moreover, looking inside your tubes and checking their lights are recommended.
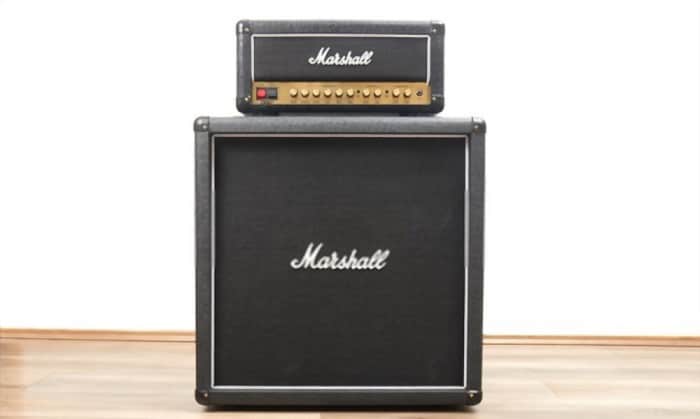
In any case, regularly checking your unit, such as bias a Marshall tube amp every three to six months may help you with its maintenance.
Conclusion
You may notice that the guide above on how to bias tube amp with multimeter is simple and easy to follow. So, consider referring to this article if you can’t get the sound you want while playing music.
However, if you have trouble working on electrical gadgets, asking for a professional electrician’s help is also a good idea.

Sam Stephenson is a writer who grew up in Washington, North Carolina. He was 2010 and 2015 ASCAP Deems Taylor / Virgil Thomson Prize winner and a 2019-2020 Guggenheim Fellow in General Nonfiction. His books have been published by W.W. Norton, Alfred A. Knopf, and Farrar, Straus and Giroux