
It is considered a golden ability if you know how to connect 2 amplifiers together, even if you only have a single power wire. Though, this dexterity is a no-brainer for car audio systems enthusiasts. You can triumphantly connect 2 amplifiers to one set of speakers that will eventually enhance and maximize the full experience with your audio.
This step-by-step process will guide you by streamlining the wiring process for a more powerful yet seamless audio connection.Let us all dive in and learn how to hook up 2 amps with 1 power wire.
Table of Contents
- Steps to Bridge an Amp to Another Amp With 1 Power Wire
- Step 1: Prepare
- Step 2: Ensure to Disengage the battery of your car
- Step 3: Identify the accurate size of the power wire gauge
- Step 4: Linking the Power Wire to 2 Amplifiers
- Step 5: Split Up the Power Wire
- Step 6: Ensure that the Power Wire is Linked to the Amplifiers
- Step 7: Establish a Solid Ground Amplifiers
- Step 8: Secure the Remote Turn-On Wiring
- Step 9: Setup the RCA Cable
- Step 10: Acquire a subwoofer connection
- Step 11: Fuse Box Installation
- Step 12: Re Engage the Car’s Battery
- Conclusion
Steps to Bridge an Amp to Another Amp With 1 Power Wire
The simplest method is through a distribution block for 2 amps. But in this particular topic, we will focus on the procedure of how to link two amplifiers together with 1 power wire with only 1 pre-out.
Ensure that you have prepared the things listed below that can help you as you link 2 amplifiers with 1 power wire in a car.
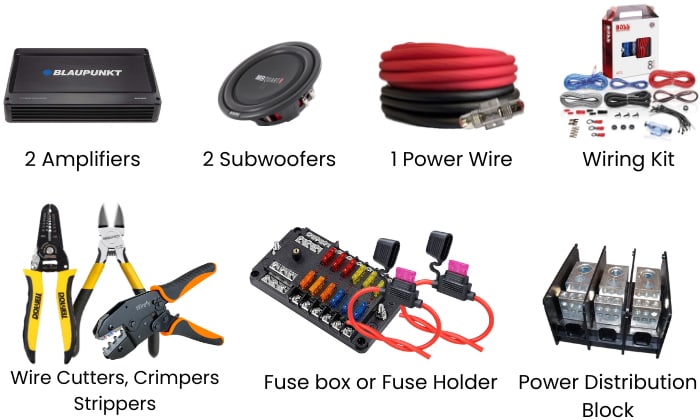
Step 1: Prepare
- 2 amplifiers
- 2 subwoofers
- 1 power wire (ensure that it is with the appropriate gauge)
- Wiring Kit (which includes the RCA Cable with one RCA Jack, speaker wires, ground wires, gauge wire, and remote turn-on wire)
- Wire Cutters/Crimpers/Strippers
- Fuse box or Fuse Holder (making sure that it matches the wire gauge)
- Power Distribution Block
Step 2: Ensure to Disengage the battery of your car
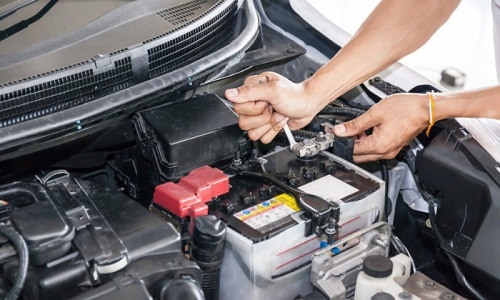
Regardless of whether it is the negative or positive terminal of your car’s battery, you must always disengage the battery.
This is a safety precaution to avoid any possible short circuit that could happen while you start working on the connection of your electrical cables.
Step 3: Identify the accurate size of the power wire gauge
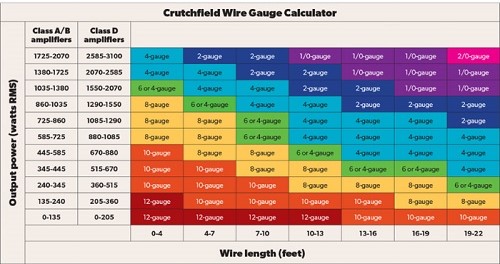
Before the installation and connection process, ensure you have inspected your system’s power requirements. You must properly calculated the accurate gauge of the power wire in accordance with the merged amperage of the dual amplifier.
The power wire gauge often determines if it can provide adequate power to install amplifiers. In calculating the expected gauge of the power wire, you can use the RMS, also known as the Root Mean Square wattage of both amplifiers. Once you get the RMS wattage, refer to the power wire gauge size chart.
Also, consult a professional or use the wiring diagram as your reference for your amplifier’s manual.
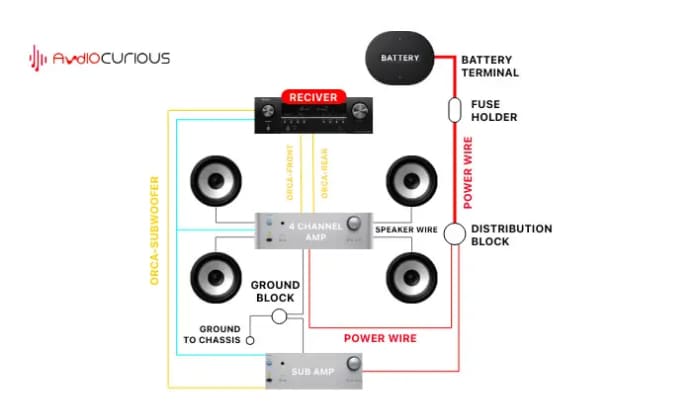
Step 4: Linking the Power Wire to 2 Amplifiers

Now, connect one side of the positive terminal of your car’s battery. Set up the wire to the amplifiers by routing it through the car.
Step 5: Split Up the Power Wire
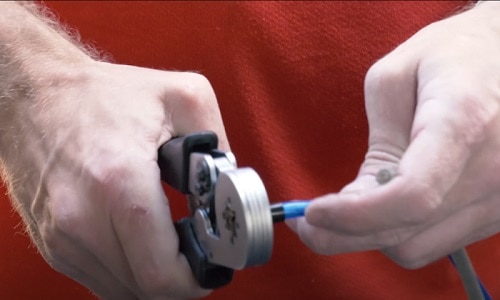
This process of hooking up 2 amps with 1 power wire works without a distribution block. Using a wire cutter, split up the power wire into an identical size or length just near the location of the amplifiers.
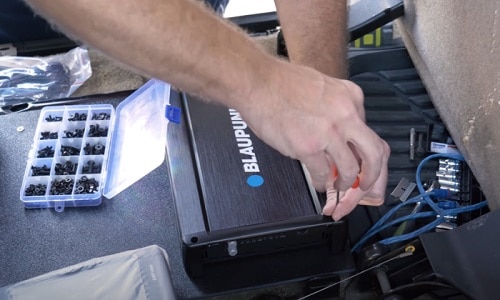
Step 6: Ensure that the Power Wire is Linked to the Amplifiers

Link a power wire to each power input of the amplifier. Thoroughly check that you have secured a clean connection of your power wire and amplifiers to avoid causing shocks.
Step 7: Establish a Solid Ground Amplifiers
In order to establish a solid ground amplifier, you can take advantage of the power block by grounding the section of a chassis with a plain metal to avoid potential difficulties with ground loops. Ensure you have also brushed away any debris or paint residue for a strong connection.
Step 8: Secure the Remote Turn-On Wiring
You must run through a remote turn-on wire from your head unit to the 2 amplifiers. This will signal both amplifiers when to turn the power off and on.
Step 9: Setup the RCA Cable
Since your head unit is only provided with 1 pre-out, it is necessary that you chaincast the connection. Ensure that the RCA cable is connected to the pre-out of the head unit.
Afterward, you must attach another RCA cable from the RCA output of the first amplifier onto the RCA input of the second amplifier, successfully linking both in series.
Though, you can also opt to hook up multiple amps in order to expand your sound system for better experience only as needed.
Step 10: Acquire a subwoofer connection
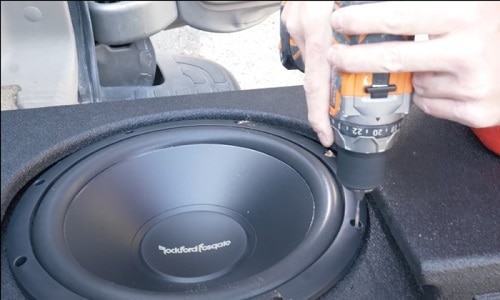
In this step, it is fundamental that you unite the wires of the speakers of the respective amplifier to the subwoofers. Secure an accurate variation and connections.
Step 11: Fuse Box Installation
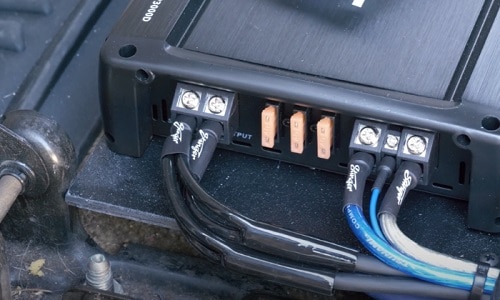
Set up a suitable fuse box adjacent to the battery on each power wire fragment and each power input of the amplifiers. The fuse box will protect your electrical system from any circuit issues.
Step 12: Re Engage the Car’s Battery
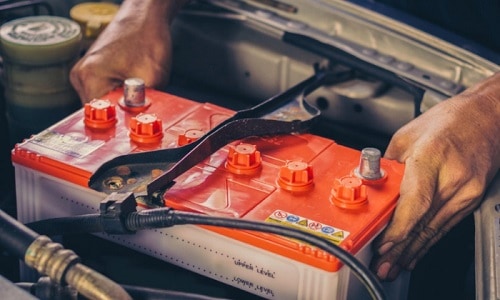
Before testing your new audio system to check that your new amplifiers function accordingly by driving their corresponding subwoofers, ensure you have re-engaged the car’s battery first.
Conclusion
Enjoy your road trip with your friends or family, with your newly upgraded audio system. Though at first thought you may consider it a tedious process, you already know the procedure on how to hook up 2 amps with 1 power wire.
You can now efficiently hook up 2 amps and 2 subs with one source of power wire using one RCA jack. Bear in mind to always refer to your vehicle and amplifier manuals for safety precautions, as well as certain instructions that you must observe.

Sam Stephenson is a writer who grew up in Washington, North Carolina. He was 2010 and 2015 ASCAP Deems Taylor / Virgil Thomson Prize winner and a 2019-2020 Guggenheim Fellow in General Nonfiction. His books have been published by W.W. Norton, Alfred A. Knopf, and Farrar, Straus and Giroux